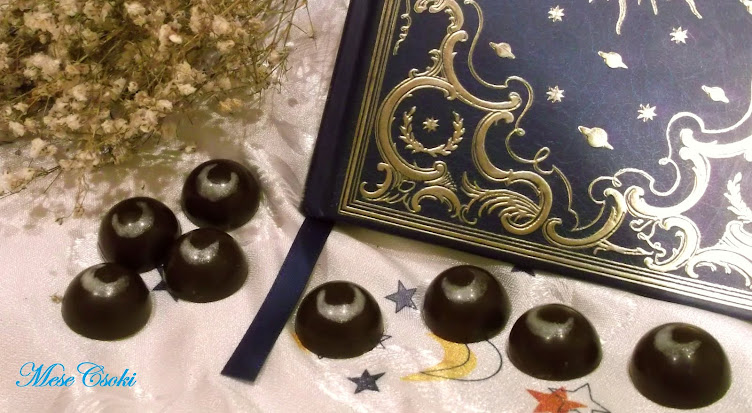
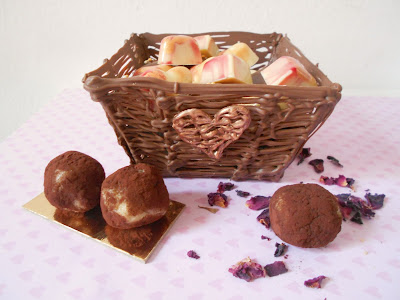
Valentin napra volt egy pár ötletem talonban, amiket végre megvalósítottam. Az egyik egy csokiból készült fonott kosárka, a másik pedig a házi marcipán, amit mindössze négy hozzávalóból készítettem el. A bonbonok töltelékei már nagyjából mind szerepeltek a blogon, ezért ezeket most külön nem írom le. Vannak köztük egyszerű rózsás ganache-sal, áfonyás-levendulás krémmel, mangós krémmel és sós karamellel töltöttek. Igazából a töltelékek egy másik projekthez (is) készültek, ezeket egyelőre azért sem akarom külön megosztani.
Csokikosár hozzávalók:
100 gr tejcsoki
lüszterpor
ceruza, sütőpapírElkészítés:
Először megtervezem a kosárkát: először egy 7 cm-es oldalú négyzetet rajzoltam fel sütőpapírra, majd a kosár oldalait külön-külön 7-7 cm-es alappal, 6 cm-es oldalhosszúsággal rajzoltam meg. Valójában elég egyet megszerkeszteni ezek közül, azt sablonként használva a többit - mivel a sütőpapír amúgy is átlátszó - át lehet kopírozni. Továbbá rajzoltam még egy szív formát is, a kosár tervezett oldalmagasságához igazítva.
Temperáltam a tejcsokit és habzsákba töltöttem, majd gyors mozdulatokkal többször körbehúztam a kosár egyik oldalát, két "merevítő" vonalat is húztam bele függőlegesen, aztán vízszintesen kezdtem megrajzolni a "vesszőket", amikből a kosár készült. Ugyanígy jártam el a kosár aljánál és a többi oldalánál, igyekeztem elég sűrűre "rajzolni" a vesszőket, de azért hagyni néhány lyukat is köztük. A szívet is hasonló módszerrel készítettem el.
Amikor az oldalak megszáradtak, lehúztam őket a papírról, majd elővettem 4 kisebb poharat, az egyiket a kosár alap mellé állítottam. Nekitámasztottam a kosár egyik oldalát, és megnéztem, milyen szögben kell majd állnia, hogy hozzá tudjam illeszteni egy másik oldalát is. Ebben a szögben ecsetre kent temperált csokival hozzáragasztottam az alaphoz. A következő pohárral kitámasztottam a kosár szomszédos oldalát, amit szintúgy hozzáragasztottam az aljhoz, valamint a már álló oldalhoz is. A hátralévő oldalakat ugyanígy rögzítettem, végül vártam negyed órát, hogy a csoki egészen megszilárduljon. Akkor elvettem a poharakat, és voilá! Kész is volt a kosár. Utoljára bronz lüszterrel befestettem a csokiszívet, és olvasztott csokival felragasztottam az egyik oldalra.
Marcipán hozzávalók:
200 gr mandula
200 gr porcukor
50 ml víz
mandulaaroma
rózsaméz
Elkészítés:
Ha héjas mandulával dolgozunk, érdemes előbb 3-4 percre lobogó forró vízben főzni, így könnyen lejön a héja. Utána egy napig szárítani kell.
Összedarálom a mandulát, a porcukor felét kimérem és hozzáadom. Én a darálóban elegyítettem a már felaprított mandulát és a cukrot is. Egy tálba szórom, hozzáadok két kiskanálnyi mandulaaromát és egy kiskanálnyi rózsamézet. A maradék porcukorból és fél deci vízből szirupot főzök, amit óvatosan adagolok a mandulához. Elkezdem gyúrni az egészet, és közben addig öntöm hozzá a szirupot, amíg megfelelő (formázható, de nem túl folyós) lesz az állaga. Golyókat formázok a marcipánból, meghempergetem őket kakaóporban.

Chocolate basket ingredients:
100 gr milk chocolate
luster dust
pencil, parchment paper
How to prepare:
First, I design the wicker basket: I drew a square of 7 cm sides on the paper, then the sides of the basket with a 7-7 cm basis and 6 cm height. In reality it is enough to design one side, which can be used as template - as the parchment paper is transparent, it is easy to copy 3 more of it. Additionally, I drew a heart shape, whose size was adjusted to the height of the planned basket.
I tempered the milk chocolate and poured it in a piping bag. Then with quick movements, I drew the edges of one of the side panels and I also drew two more vertical lines which would serve as "braces". Afterwards, I drew short horizontal lines which would give the pattern of the wickerwork. I did the same with the bottom of the basket and the rest of the side panels; I tried to make the "wickerwork" dense but occasionally leaving some holes in it too. I made the heart with the same method.
When the sides were ready, I peeled them off the paper, then I took 4 smaller glasses and set one of them next to the bottom of the basket. I leaned one of the side panels to the glass and checked the right angle with which another side panel could join it. I glued the first side panel to the basis in this very angle, using tempered milk chocolate and a brush. I used the next glass to support the second side panel and glued that one to the basis, then to the first side panel too. I used the same method for the other two sides, then I waited 15 minutes until the chocolate set. Then I put away the glasses and voilá! The basket was ready. Finally, I painted the chocolate heart with bronze luster and glued it on one side of the basket with melted chocolate.
Marzipan ingredients:
200 gr almond
200 gr icing sugar
50 ml water
almond aroma
rose honey
Recipe:
If you use almonds which are not peeled, first boil them in hot water for 3-4 minutes, afterwards you can peel it easily. Then you need to dry them for a day.
I grind the almonds and add half of the icing sugar, too. I used the food processor to mix them properly. I pour the almond in a bowl, I add two small spoons of almond aroma and one spoon of rose honey. I add 50 ml water to the leftover sugar and I make sugar syrup of it. I add small portions of this syrup to the almond while I keep kneading it. I add the syrup until the consistency of the marzipan becomes perfect (shapeable but not runny). I shape small balls and roll them in cocoa powder.


